Prerequisits
- Go through the system-setup and make sure the system is operational.
- Setup should be done in DDC_U mode (minimum version: 126)
- Board C should be connected to E090VLI (=LCP)
- Board D should be connected to E090HLI (=RCP)
- Two modules are loaded and connected into slot 1&2 of recorder3
- Make sure you have loaded the correct modules intended for recording the GMVA session
DBBC3 initialization
- Log into the DBBC3 (user dbbc, password: ask Salvador/Helge); can be done also via remote desktop from mrt-vlbi2
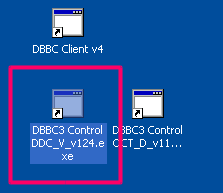
- On the desktop double-click: "DBBC3 Control DDC_U_vXXX.exe.." icon (exact name can vary depending on the version)

- Answer question "configure" with "y". Configuration will take 10-15 minutes. If the DDC_U firmware was previously loaded and you want to only re-initialize the system you can answer "n" to proceed (see next step)
- If you answered "n" on the previous question you will be asked whether to initialize the ADB3L/Core3H". Answer "y". This will take around 5 minutes. This step does not reload the firmware, but re-reads all configuration files, clears settings etc.
DBBC3 verification
- log into the control computer as user oper
- in terminal:
cd  /home/oper/rottmann/dbbc3/utilities
./setupDBBC3_DDC_U.py dbbc3
- Check that all responses are [OK]
- In case of warnings or errors follow the suggestions printed by the script.
Mark6 module initialization
- Skip this section if there is already recorded data on the modules! The following steps will delete all data on the modules!
- log-into recorder3 as user oper: ssh recorder3
- make sure the modules are inserted in slots 1 and 2
- execute: da-client
- in da-client:
mod_init=1:8:{VSN}:sg:new           replace    {VSN} with VSN as indicated on the label of module1
mod_init=2:8:{VSN}:sg:new        replace {VSN} with VSN as indicated on the label of module2
group=new:12
Mark6 setup
- log-into recorder3: ssh recorder3 -l oper -X
- execute: m6service_restart
- execute: da-client
- in da-client:
mstat?1
mstat?2
make sure the group is NOT in "open" state. If it is in "open" state you must first do:
group=close:12
Otherwise continue with:
input_stream=add:DBBC31:vdif:8224:50:42:eth3:::1
input_stream=add:DBBC32:vdif:8224:50:42:eth5:::2
input_stream=commit
group=open:12
mstat?1
mstat?2
The last statements should report the group to be in open:ready state, e.g.:
!mstat?0:0:12:1:MPI%3211/32000/4/8:8:8:31989:32000:open:ready:sg;
!mstat?0:0:12:2:MPIP%016/32000/4/8:8:8:31989:32000:open:ready:sg;
Loading/starting the schedule
- log-into recorder3 as user oper: ssh recorder3 -l oper -X
- Download/copy the vex file into the directory: /home/oper/shared/schedules
- Translate the vex-file
cd /home/oper/shared/schedules
vex2xml.py -f {vexfile} -s PV  (the station code must be the same than in the vex file)
less {vexfile} -s PV
- Check the contents of the produced xml-file. It should not be empty and contain several scan entries, similar to this:
<experiment name="a90xx" station="PV" start="2015090003000"  end="2015090032200">
        <scan experiment="a90xx" source="3C279" station_code="PV" start_time="2015090003000" duration="420" scan_name="090-0030"/>
        <scan experiment="a90xx" source="3C279" station_code="PV" start_time="2015090004500" duration="420"
        <scan experiment="a90xx" source="3C279" station_code="PV" start_time="2015090031500" duration="420" scan_name="090-0315"/>
</experiment>
NOTE: If the file is empty check that the station code given in the vex2xml.py command matches the station code for Pico Veleta of the vex-file.
- Start the schedule
- Method 1 (prefered):
ssh recorder3
cd ~/shared/schedules
start_gmva.py {xmlfile}
where {xmlfile} is the xml-file produced by vex2xml.py (see above).
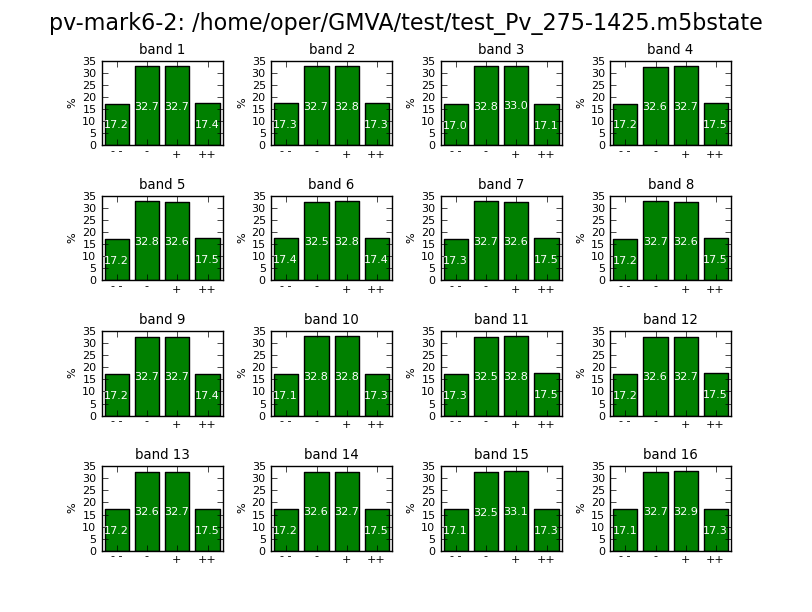
The script will start the schedule and in the scan gaps will display graphical information about the 16 PFB channels (bandpasses, and 2-bit statistics). The output is also stored in text-format under /home/oper/GMVA/{code}.
|
|  |
- Method 2 (backup):
ssh recoorder3
cd ~/shared/schedules
M6_CC -f {xmlfile}
where {xmlfile} is the xml-file produced by vex2xml.py (see above)
End of session / Module change
When the session has ended or when a new module needs to be inserted:
- in da-client:
group=close:12
group=unmount:12
turn the module keys off and remove the modules.
System verification & trouble shooting
Checking ethernet connections
Occasionally transceivers on the DBBC3 are not activated properly.
To check the state of the transceivers on boards C and D:
- log into the control computer as user oper
- in terminal:
cd  /home/oper/rottmann/dbbc3/utilities
./dbbc3ctl.py dbbc3
At the prompt issue:
check recorder recorder3 eth3
check recorder recorder3 eth5
Both commands should reply a state of UP
Should any of the states be "DOWN" do the following:
- Open the front or top cover of the DBBC3
- Pull the transceiver that is not working and re-plug it (see below for transceiver layout)
- Make sure the fibre cables are firmly plugged-into the transceiver
Transceiver layout when facing the front side of the DBBC3:
- Board C transceiver closest to you serves recorder3 eth3
- Board D transceiver closest to you serves recorder3 eth5
Check time synchronisation (deprecated, see Load DBBC3mon below)
Time syncronisation can be checked with the tick command via the serial interface.
Follow these steps below exactly. Omitting any step will lead to mal-functioning and will require to completely reload the firmware.
On the DBBC3 desktop:
- double-click the putty icon
- in putty open connection e.g. to DBBC3 Board C
- in the window hit enter to get to the command prompt and execute:
tick
- compare the timestamps to a radio-controlled clock
- when done hit enter to stop the tick command
- close the putty window
In case the synchronisation has failed re-initiliaze the DBBC3.
Check ddbcif power levels and attenuators (deprecated, see Load DBBC3mon below)
Check that the automatic attenuators are about 30 dB for the dbbcifC and dbbcifD boards. You must have the telescope at an elevation on about 45 deg and looking at sky
On the DBBC3 desktop:
- double-click the DBBC client v4 icon
- In the terminal run commands "dbbcifc" and "dbbcifd" to check the power level in counts and the attenuator levels
- Adjust the attunation in the receiver chain until levels make the automatic attenuators be at around 30 dB (+/-3-4 dB if ok)
Load DBBC3mon to check time sync and attenuator level
On the control computer, in a terminal:
- Login to the control computer with graphical forwarding (ssh -X ...)
- cd /home/oper/rottmann/dbbc3/utilities/
- Run command "./dbbc3mon.py -i 192.168.0.1 -b 0,1,2,3"
- A graphical tool will open. Check in "Time" section the timing sync vs a radio-controlled clock or the observatory clock. Check at the top "IF Power" section the power levels and automatic attenuators. Adjust power levels in receiver if needed until setting the attenuators at about 30dB. Error messages in the sampler section are normal and can be usually ignored.
Plot bandpasses
log into recorder3 as user oper:
ssh recorder3 -Y -l oper
plot_dbbc3_64MHz.sh
This will start a short recording and will bring up a bandpass plot for the two polarizations.


Comments